These days, there is plenty of information on the internet to help you do anything you wish. However, that can sometimes prove to be an issue. In these posts, there will be a few as Jenkins is a large topic, I intend to distill the work I have done to setup a working CI/CD pipeline from scratch.
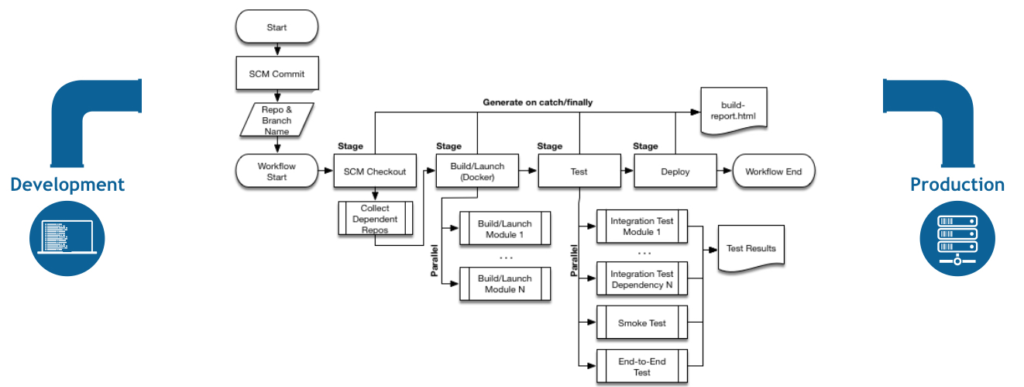
Jenkins is a long-trusted automation tool. With it, you can automate your entire pipeline. With Jenkins setup, you can setup a conceptual pipeline for your teams code, from push to branch –> basic testing –> merge to master –> build and packaging –> integration testing –> deployment

To achieve this all you need is a relatively humble machine; 1GB RAM and 50GB disk. Of course, your needs may vary and having a larger, more powerful machine will not be a problem, but the main point of the basic requirements is that you need much less than you imagined to have your very own CI/CD automator.
Initial Setup
Initial setup is actually pretty simple. You can choose the docker approach, or the stand-alone approach, I chose the latter. Because I wanted to “replicate” a light-weight production-style setup I chose the following:
- Virtual Box to virtualize a VM running 2GB RAM and 50GB of disk, with a Bridge Network (it is best to do this on a machine which an remain on at all times).
- The VM is running Ubuntu Server 20.x LTS.
- I setup port-forwarding on my router to forward external traffic to the VM, which I named: jenkins.home.
Installation
The installation went very well, I basically followed the steps here:
Make sure everything is up to date:
sudo -- sh -c 'apt-get update; apt-get upgrade -y; apt-get dist-upgrade -y; apt-get autoremove -y; apt-get autoclean -y';Install Java first, otherwise you’ll get an error when you try to install Jenkins:
sudo apt install openjdk-8-jdk;
java -version
openjdk version "1.8.0_265"
OpenJDK Runtime Environment (build 1.8.0_265-8u265-b01-0ubuntu2~20.04-b01)
OpenJDK 64-Bit Server VM (build 25.265-b01, mixed mode)
Install Jenkins (I chose LTS)
wget -q -O - https://pkg.jenkins.io/debian-stable/jenkins.io.key | sudo apt-key add -
sudo sh -c 'echo deb https://pkg.jenkins.io/debian-stable binary/ > \
    /etc/apt/sources.list.d/jenkins.list';
sudo apt-get update;
sudo apt-get install jenkins;
That’s all for the installation. It’s that simple. The next step is to complete the post-setup wizard
Wizard
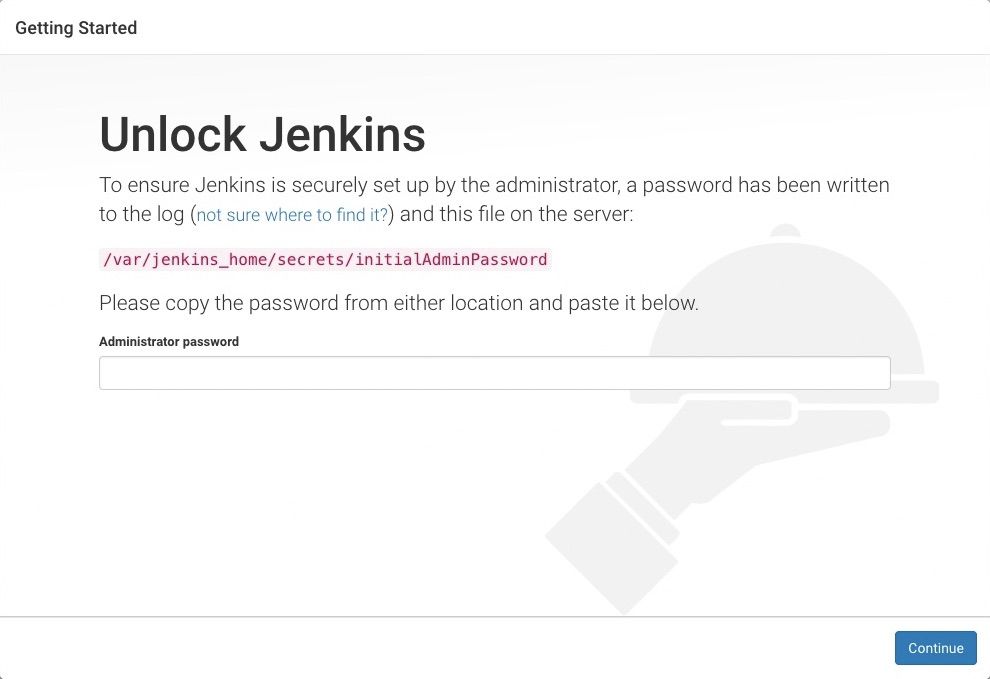
After you have successfully installed Jenkins, you need to complete the setup by logging into the server and using a randomly-generated password here:
sudo cat /var/lib/jenkins/secrets/initialAdminPassword;With the password copied, visit: http://localhost:8080 (or the IP of the VM on which you installed Jenkins)

In the wizard you will be asked what plugins to install. I installed the recommended plugins. That however, resulted in an error at the time of my installation. The error was that certain plugins (the recommended ones) could not be installed because of a missing requirement (JUnit).
The problem was the latest version of JUnit was not available for download (I think the most recent release was not yet available on the mirror or something like that). The solution was to navigate to the Manage Jenkins page and install the missing plugin (JUnit) manually.
To find the plugin you need just search for it here: https://plugins.jenkins.io/
I needed JUnit so I went to: https://plugins.jenkins.io/junit/ From there; on the left you will see “Archives Get Past Versions”.

Remember, for me the issue was the most recent version of JUnit was not available, so I downloaded the previous version (1.3.5). Plugins will have an .hpi extension.
To install the plugin go to the advanced tab and choose Upload Plugin.
In the next post I’ll talk how to create your first pipeline.